MiniMax H3 dolly-zoom prompt: hold subject size while depth changes
Plan a restrained dolly zoom from an original corridor input. Compare subject height and background perspective separately; the method has not been model-tested.
Prepare one continuous shot in which a stationary foreground target keeps approximately the same image size while the background depth relationship changes. The aim is to recognize a coupled move, rather than to decorate a simple zoom with a cinematic name.
Original practice input and untested method. No model generation, completed edit or output review has been performed.
1. Read the original input and define the outcome
Prepare your own authorized illustration with one rigid pillar on a visible plinth, three nested corridor frames and floor lines. Leave the whole pillar and its contact visible, with no assumed room beyond the drawing. Match the prompt colors to your image.
The clean S01 input shows one ochre pillar with a coral inset, standing on a teal plinth in a fictional corridor. Three nested rectangular frames and floor lines provide visible background references. The pillar is not a real product, and the drawing does not document an unseen adjoining room. The visible pillar top, plinth contact and three frame boundaries are the landmarks to compare directly. The on-page two-panel guide is an authored comparison sketch, not an ending-frame input or a successful H3 result.
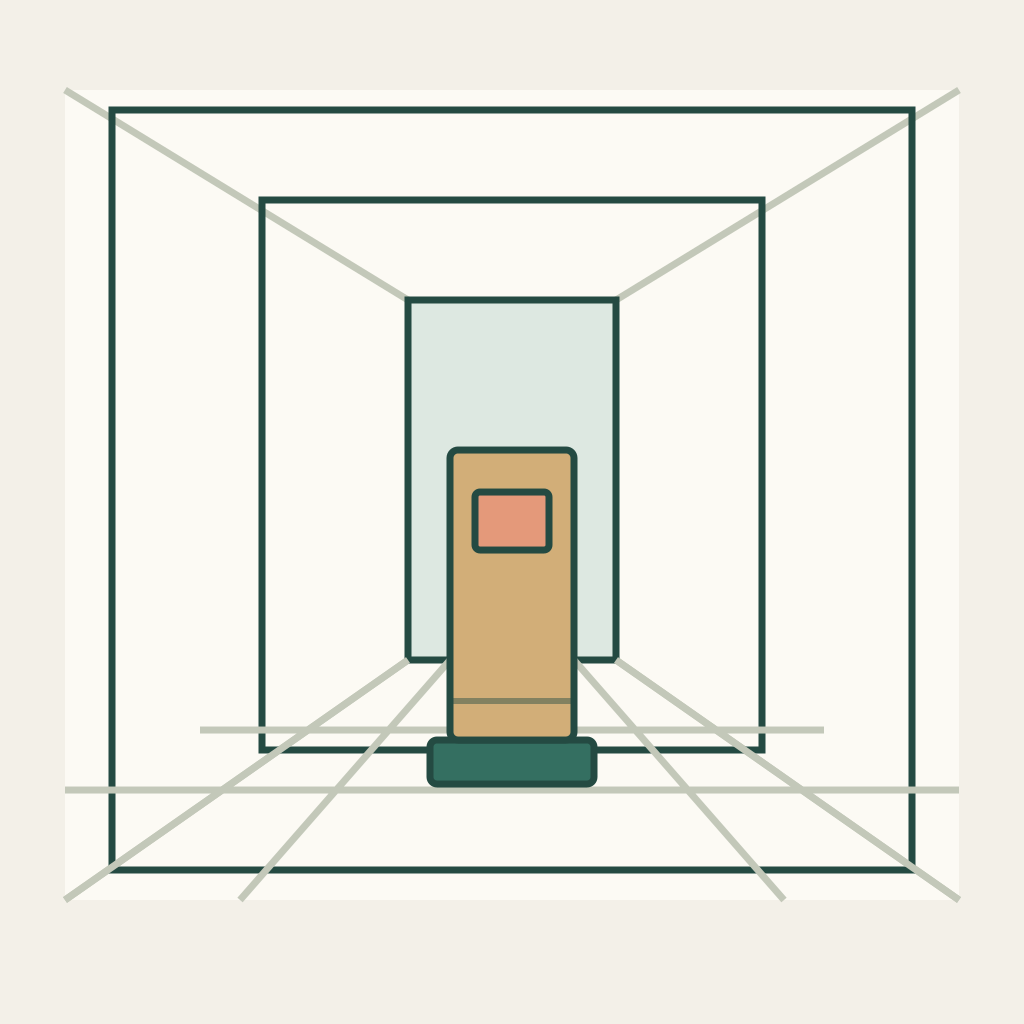
This page illustration explains the required composition; prepare your own authorized image with the relationships described below.
2. Assign motion and preserve the named relationships
The target remains stationary in the scene. The requested camera retreat and counteracting zoom are the two parts of one effect: they should approximately retain the pillar height while changing the apparent spacing of the corridor behind it. Track the pillar top and plinth contact separately from the near and far frame edges. The named landmarks identify visible features only; they are not camera keyframes or an undocumented numerical API. A full-frame crop enlarges the foreground and background together and cannot establish the intended depth change.
3. Prepare the manual single-shot task
Open one new image-to-video draft and use your single prepared corridor image. Begin with a modest retreat and an opposite framing adjustment, not an orbit, a pillar rotation or a long walkthrough. Keep the whole plinth visible so its contact can be reviewed. Before submitting, read the camera and subject sentences independently: only the viewpoint and framing are assigned motion. Retain the exact input and wording with any future take. If the requested combination is not produced, that is an unresolved result; do not describe an attractive push-in as a completed dolly zoom.
Open image-to-video and choose MiniMax H3. Enable Add end frame to expose First Frame, upload your prepared image there and leave Last Frame empty. Match the complete prompt below to the objects and colors in your image before submitting. Check the current controls and credit estimate; opening the workspace does not upload or submit a task. Keep annotated page diagrams out of the input slots.
4. Use the complete original prompt
S01 — Stationary foreground and corridor (the only default draft)
Begin from your prepared corridor illustration. The ochre pillar, coral inset and teal plinth remain stationary and rigid. Make a small smooth camera retreat along the current viewing direction while adjusting the framing in the opposite sense so the pillar keeps approximately its opening image height. Let the visible corridor frame spacing and depth relationship change around that retained foreground size. Preserve the three existing frames, floor connections and plinth contact. Do not simply scale the whole picture, move the pillar, orbit, cut, stretch the walls or reveal a new room. Stop both camera and framing change together and hold the same target. This is a qualitative visual brief, not numerical lens control.
This is one source shot. Upload your prepared image manually and copy the complete prompt above after matching its example colors and objects.
5. Inspect actual phases with your own notes
First watch the whole shot to find unintended cuts or subject drift. Then compare opening, intermediate and ending frames using the same pillar boundary each time. In your own notes record the timestamp, pillar height as a fraction of image height, the three frame references, judgment and any uncertainty; do not copy illustration coordinates as observations of actual video. Approximate subject-size stability and a visible background-depth change are both needed. A matching final pillar size alone could conceal an ordinary zoom followed by an abrupt correction.
- One stationary pillar and plinth remain identifiable without stretching or a ground slip.
- Pillar image height stays approximately near its opening value while background frame relationships visibly change.
- The change is continuous, with no cut or whole-image scale-only substitution.
- The ending settles without cropping the target or inventing a new room.
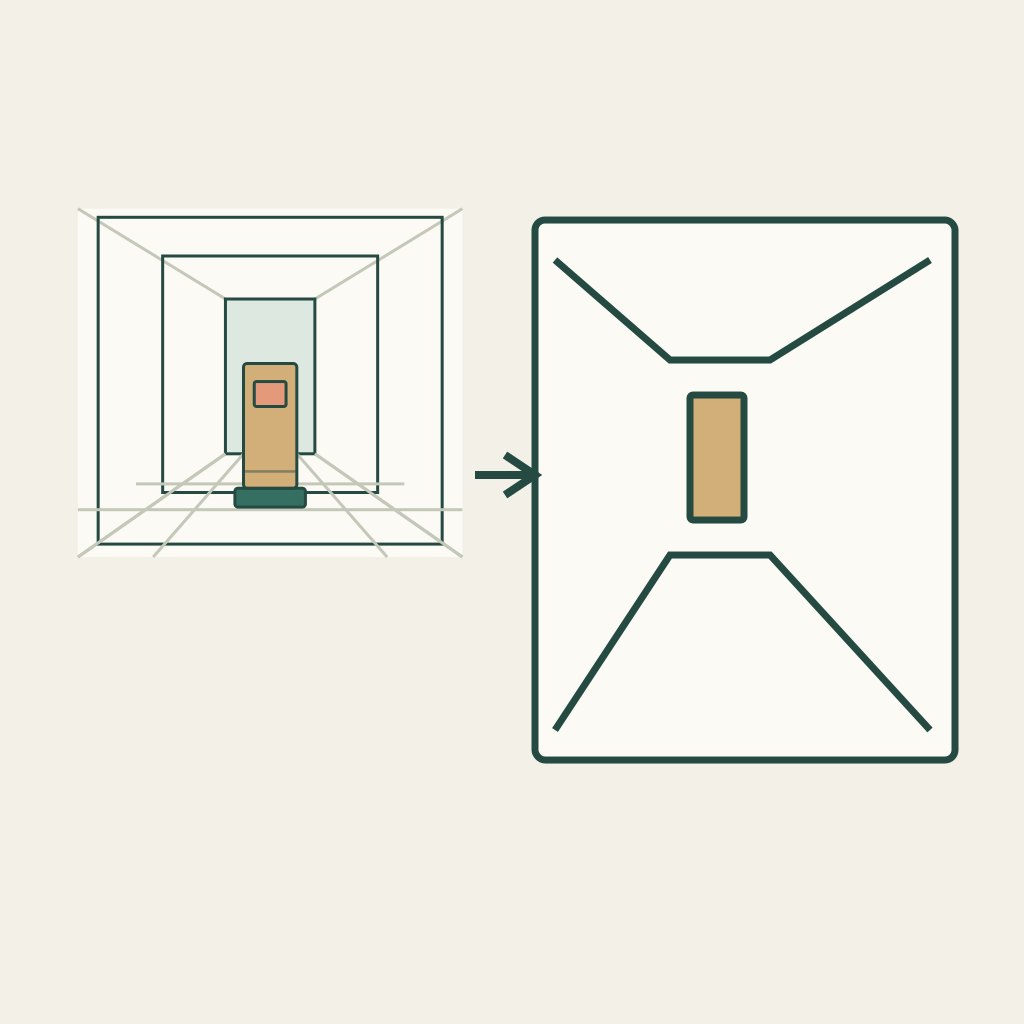
Authored comparison only, not a model output or an extra generation input.
6. Change one failed relationship at a time
If everything grows together, remove words asking for a close-up and restate the counteracting camera/framing relationship. If the pillar slides across the floor, strengthen only its fixed plinth contact before changing the camera range. If corridor frames bend or multiply, reduce the move and retain the originally visible space. If the target is cropped, choose a smaller range rather than inventing a second target at the ending. Keep each attempted change separate; neither a source replacement nor a second model choice isolates the original camera instruction.
7. Keep the materials and state the limits
A future accepted take ends with the same pillar settled on the same plinth, roughly the opening image height, and a distinguishable new background-depth relationship. Keep your actual input image, exact prompt, untrimmed result and timestamped observations together. Record results only after viewing actual frames.
The existing tracking-walk page follows a moving person, while transparent-object parallax changes the view through a fixed object. This exercise instead couples camera distance and framing around a stationary foreground size anchor. It does not guarantee lens control, a calibrated trajectory, perfect perspective, factual hidden surfaces or successful generation.